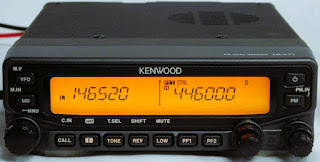
Kenwood TM-V71A Fan Swap or Replacement
The dual bander in my truck started to make some racket from the fan and I was told I had noise on TX. So, I figured it was the fan going out as it had audible noise to indicate that. It turned out the noise on TX was another issue, the infamous Kenwood audio tick, a new mic cord fixes that.
I did a quick look around the web and found a nice fan from Noctua. Noctua is known for high end, silent fans for computers and other applications. Sure enough they have one that is a near direct replacement for the fan on the V71. The is the Noctua NF-A4x10 FLX. ~$14 as of this writing.
This fan does have to have the leads cut and soldered to the connector from the original fan. That is a simple operation for anyone who has basic soldering skills. And if you don't, maybe you could practice a bit and tackle this project. Just leave enough "tail" on everything you cut so that you can cut again and re-solder if necessary.
Remove the cover from the radio being careful to use the proper sized screw driver. Follow the leads from the fan to the connector on the board. Gently remove the connector from the board and remove the four screws holding the fan to the chassis.
 |
| Fan Connector Location-power leads may need moved to access. |
If you need to, lift the plastic block for the power leads from the slot and carefully move them out of the way.
After the fan is removed, cut the leads on the old fan and cut the connector from the new fan and prep the wires for soldering and heatshrink. I used some of the sleeve that is on the new fan to dress up the look for the new install.
 |
| Heat shrink and fan ready to solder. |
 |
| Leads soldered and dressed up. |
 |
| New fan ready to install. |
I routed the new leads under the speaker mounting. There is a hidden screw under the speaker, so lift the speaker out and remove it before trying to move the bracket.
 |
| Hidden Screw |
Screw the new fan in place, being careful not to pinch the wire between the fan and chassis. Route the wire to the connector and plug it in. Replace the speaker bracket, again be careful not to pinch the wires. Replace the cover and you will have a nice quiet fan.
 |
| The new fan installed. |
 |
| Comparison of new and old fan. |
 |
| Side by side. |
This is a very easy project for anyone needing to replace the factory fan or if you just want a quieter fan on the radio. After doing this on my mobile in the truck, I will be ordering another fan to put on the V71 I use from the wall tent. It makes that much difference on fan noise.
I hope you found this article educational or at least entertaining.
73, WD9N


Comments
Post a Comment
I welcome comments, keep it on topic. Inappropriate comments will be removed.